 We’re in the thick of the digital age, from here on out you will accumulate thousands and thousands of digital photos in your lifetime, not just from your trip. With a little knowledge, planning and preparation, you can take great pictures, and keep them organized and accessible for years to come.
Know your Camera
You find yourself on Lombok watching the most amazing sunset ever, yet you can’t just seem to capture the moment. Your friend is bungee jumping, and you want to capture that split second moment when they touch the water, but don’t know how to work the shutter speed. If Aperture sounds more like French dish than a setting on your camera, then perhaps buying the top of the line camera isn’t for you. While pages could be written on what kind of camera to buy for your trip, it’s simple, only take what you know how to use. I find more and more people out on the road with the latest digital camera but have no idea how to use all the functions. Know your camera’s limitations. If you know your camera performs horrible in lowlight conditions, then don’t waste your time trying to catch that perfect milky-way shot in the middle of the outback. Most people turn their settings to automatic and snap away, while fine for 80% of shots, you should have a basic idea of what each of the functions on your camera do. When it comes to your camera, knowledge is power.
Bigger isn’t always better
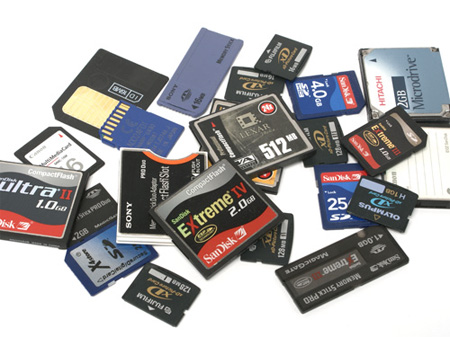
You don’t need the highest megapixel camera on the market. Unless you a professional photographer and you probably won’t be blowing up any pictures greater than an 8×10 size, a simple 3-4 megapixel camera will suffice. You also don’t need the highest capacity gigabyte memory card available. You always want to minimize your risk. You wouldn’t put all your eggs in one basket, so you certainly shouldn’t put your entire trip on a single 4 GB memory card. When I was working as a professional photographer on a cruise ship, my job was to take the picture of every guest in a restaurant, I found myself with 5 (250mb) size cards, and could quickly rotate cards once they became full. At the end of the night, it made organizing and storing photos so much easier, I didn’t’ have to sort through a thousand photos on 1 card, and wait an hour while they finished downloading. I could quickly download, and name each card and move on. And if the unthinkable did happen and I had a jam or lost the data on 1 card, I would still have come back with over 75% of the day covered.
Beep Beep – Back it up
I met a girl who was 9 months into her year long trip, who was robbed in S. America. Her camera was stolen along with her 4 gigabyte memory card that contained her entire trip’s photos. She hadn’t backed it up and expected to come home with a single card of her entire trip. Apart from the risk, do you really want to sort through 2000 pictures on a single memory card? Do you have the time & money to spare at an internet café e while the entire card downloads? There are many ways to backup your photos, some carry portable hard drives, laptops, but by far the easiest method is to burn them onto a CD. Five 500mb memory cards will be much more effective than 1 4 GB card. It will also help to organize your photos as each card will contain different days/cities/events. A CD holds 700mb, so a 500mb memory card is the perfect size to burn pics to a CD. Unless you are trigger happy, you’ll often find 500mb is plenty of picture taking for most days. I often make 2 copies of each CD from each memory card. I mail one CD home, keep a CD (separate from my camera/memory card). And with 5 memory cards, I’ll only be formatting (deleting) only one card at any given time. In effect, I have created backups on 3 sources and have minimized my risk as much as I can. There’s now also plenty of FTP and blog sites that can help you store your photos on the road. There’s no excuse for losing your photos on the road.
Take out the Trash
DELETE what you don’t need. I can’t stress this one enough. How many times do I have to wait while someone scrolls through dozens of unwanted photographs to get to the one they want? If you’re taking pictures of the sunrise over Angkor Wat, and the first 5 shots come out blurry. Don’t keep them. The half second it takes to hit the rubbish/trash can icon on the camera will save you hours later. The whole purpose of the viewfinder is to give you the ability to view your results immediately. You’re capturing that perfect moment when another person’s head moves into your shot and ruins it. Why keep it, to show your friends the back of someone’s head? Delete it immediately and try again. Ask yourself, would I put this photo in an album when I get home? If the answer is no, then delete. You’ll still come home with hundreds if not thousands of photos, but the difference is, they will all be good quality and printable shots.
What’s in a name?
Naming folders and photos is key: Don’t stick 1000 photos in a single folder and call it SE Asia. You’re the only one who is going to get frustrated trying to search through the folder to get what you need. Consider a hierarchy approach with dates. The master folder should be created with a date. “SE Asia 2008” From there a good way to break up the trip is by country “Thailand May 2008” and from there break into subcategories. “Phuket 06/08” “Bangkok June 08” etc. Generally speaking you shouldn’t really have more than a hundred or so photos in a single folder. Unless you want to view thumbnails for all your pictures you should always rename your individual photos. Your camera will generate an automatic code typically in ascending numerics. But it’s simple to batch rename all the photos in your folder with a single click. There are many programs out there that can do this. I recommend Ifranview. It’s free software, but the developer doesn’t deny $10 donations either. It’s also common now to “tag” your photos. When your friends come over, and you think, let me show you this amazing shot of when a blindfolded elephant stepped over my head. You can instantly, search, and locate the photo you need within seconds and not spend countless minutes searching while your disinterested friends move on.
Editing is half the fun
If you do plan on sharing your pictures at some point, I always recommend some quick editing. People get tired of looking at bad pictures very quickly. There are numerous Microsoft and Adobe products among hundreds of other programs that can help you achieve quick and great results. If you weren’t ‘editing’ your shots as you were taking them, a simple quick crop, red eye reduction, color correction, resize, can make a world of difference. If you want to email some pics, don’t send a huge file when you can batch resize to thumbnails and send a couple dozen photos imbedded in a quick email that loads on the other end instantly. Also before you even start to edit, make sure you always have the originals intact. It’s very easy to save over the original. Always create a new folder, and copy the originals in there, you can easily batch rename everything to “Beijing 8.8.08 – original”
Who is your audience?
Decide what you want from your pictures. What’s the end result you desire? Are they going on your blog/website? Are you going to print them and stick them in an album when you get home? Are you going to email them, put them on your walls, sell them, or merely just stick on your Facebook or Myspace account? Knowing your end result can help you make effective decisions on the road. If you have no intention of printing them, then you can skip the editing step. If you are posting online, then size and editing become crucial.
Here are some useful online references when it comes to managing your photos:
Digital Camera Reviews:
Editing Software:
Roxio Photosuite
Photo Storage Websites:
Snapfish
The Bottom Line: Don’t be lazy
There’s nothing more rewarding then coming home and sharing your trip through stories and photos with your family and friends. In today’s digital age, there’s no excuse for not taking a little time and effort in creating long lasting memories. Don’t be lazy, with the right tools and effort your trips truly can last a lifetime.
Do you have any tips for organizing your photos?

